|
||||||||
Installation and ConfigurationThe purpose of this chapter is to show how to install and configure numEclipse. We intend to keep the installation process as simple as possible. This chapter is divided into three sections. In the first section, we look at the pre-requisites for the installation. In the second section, we install the application. Finally, we configure the application in the third section.
1.1 Pre-requisitesWe used only windows XP for the development of numEclipse. It might work on other platforms but at this point we only support windows XP. numEclipse is developed as a plug-in for eclipse. So before we install the application, we need to install the java runtime environment and eclipse.
Note: Make sure you have the latest JRE installed. Java runtime environment (JRE) is free to download from sun's website. Download and install eclipse version 3.2.x. Download and install Graphical Editing Framework GEF plugin.
1.2 InstallationThere are basically two ways to install the numEclipse plug-in. The first method is to download the plug-in and copy it to the plugins/ folder within the eclipse installation folder (e.g. c:/eclipse). The plug-in will be active next time you launch eclipse.
The second method is more preferred way to install any eclipse plug-in. In this method, we use the eclipse update manager to download the plug-in. This approach allows you to periodically update the version directly from the eclipse application. The installation steps are described as follows.
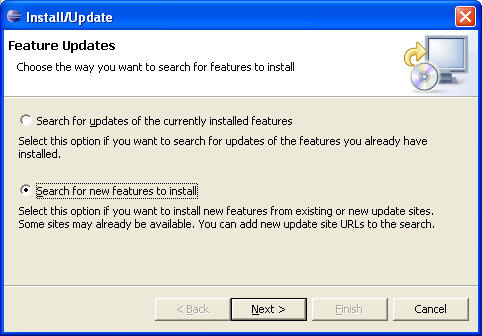
1. Select the eclipse menu "Find and Install..." as shown in the following figure. It will bring up "Install/Update" dialog box.
2. Select second option "Search for new features to install" on the "Install/Update" dialog box and then click on Next button. It will bring up "Install" dialog box.
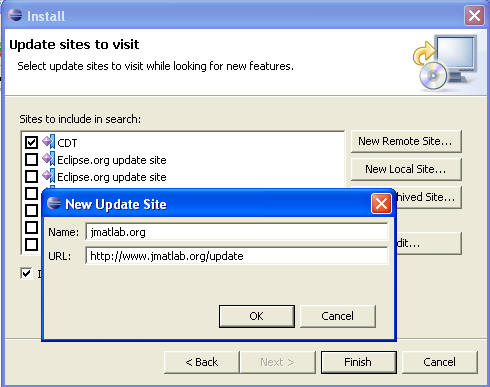
3. Click on "New Remote Site..." button and fill-out information in the "New Update Site" dialog box as shown the following figure.
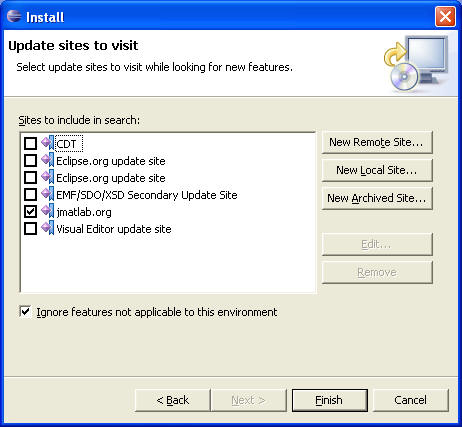
4. Select the new site "jmatlab.org" added to the "Install" dialog box and click "Finish" button. It will bring up "Updates" dialog box.
5. Select "jmatlab.org" from the features list to install and then click Next button. Accept the terms and conditions of the license and Click Next.
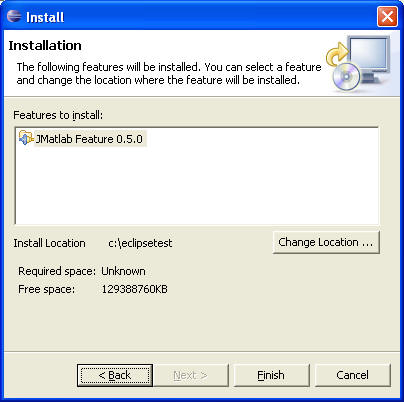
6. Finally, verify the install location on the "Install" dialog box and click on "Finish" button. Ignore the warning message and allow the application to re-start.
In order to verify that the plug-in is installed, select menu Help → About Eclipse SDK. It will bring up "About" dialog box. Click on "Plug-in Details" button. It will bring up a list of installed plug-ins. Scroll the list to verify that the numEclipse plug-in is present in this list.
This completes the installation of the plug-in. In the next section, we will configure the plug-in. 1.3 ConfigurationThis final step is required if you wish to use the application for plotting different scientific graphs. numEclipse, itself does not have any plotting capability. We developed an interface with gnuplot. This free software is very good at scientific data visualization. Following steps describe the process to configure the application.
1. Download and install a latest version of gnuplot.
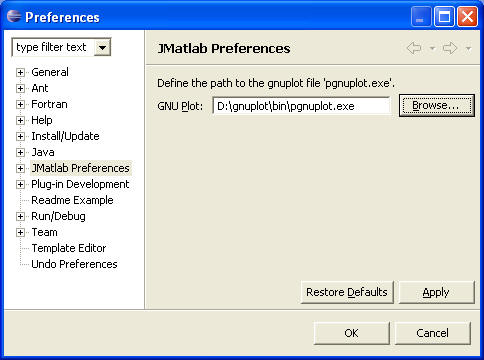
2. Select eclipse menu "Preferences" as shown in the following figure. It will bring up the "Preferences" dialog box.
3. Select "numEclipse Preferences" on the left. Click on the browse button and select the gnuplot execution program as shown in the following figure.
This completes the installation and configuration of numEclipse.
Please refer to documentation for further information. In case the application fails to install or does not function properly feel free to contact support@numEclipse.org |
||||||||