|
||||||||
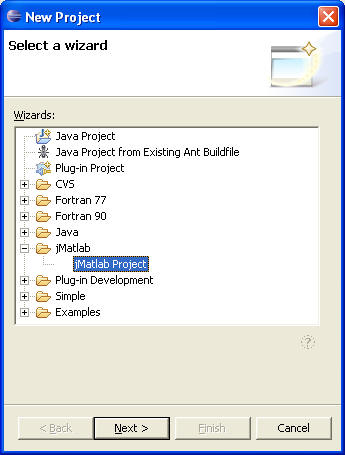
Workbench BasicsThis chapter introduces the numEclipse working environment. Unlike MATLAB, it is a more than an interpreter. It provides not only the interpreter but also a development environment in m-script. It also provides integration with java development environment of eclipse. In this chapter, we show how to create a project in numEclipse. We also introduce the numEclipse Perspective along with the related Views. 2.1 First StepBefore you interact with the interpreter or develop an application in numEclipse, you would need to create a numEclipse project. This two step process is described as follows. Select eclipse menu File → New → Project. It will bring up "New Project" dialog box. Select the wizard "numEclipse Project" under the category "numEclipse" and click on "Next" button. It will bring up the "Project Wizard" for numEclipse.
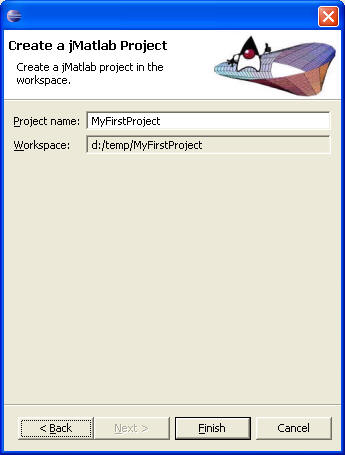
Type the project name in the textbox and click on "Finish" button, as shown in the following figure.
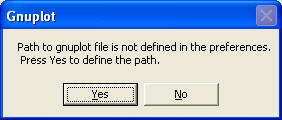
At this stage, if you have not configured the application to use gnuplot, it will give you an option to configure the integration with gnuplot application (Please refer to previous chapter for configuration). Click on "Yes" button to configure gnuplot.
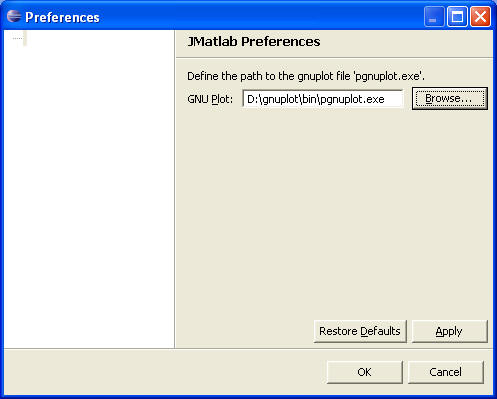
Click on "Browse" button and select the gnuplot execution file as shown in the following figure.
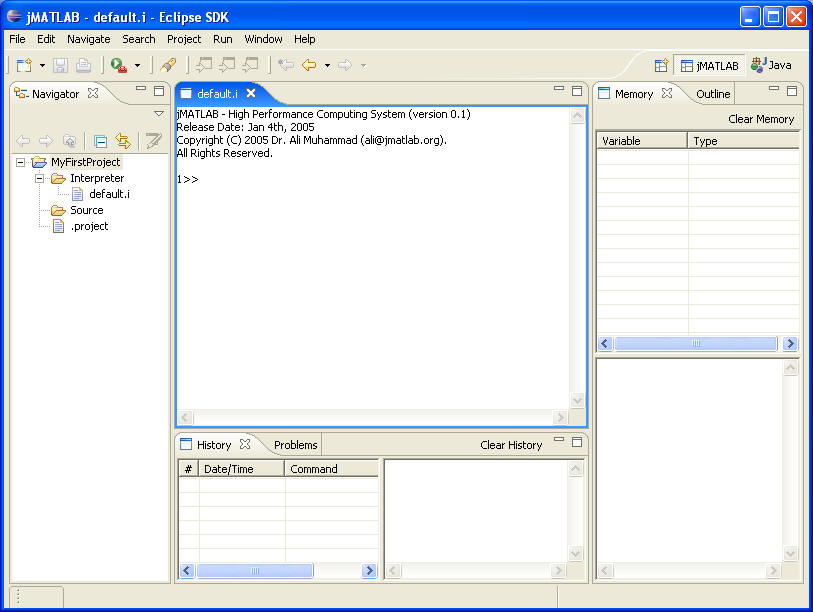
On successful completion of above steps, you will see that a project has been created in your workspace. Also, you will notice that Perspective is changed from Java to numEclipse, as shown in the following figure.
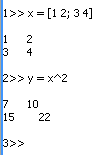
Next section will describe the numEclipse Perspective. 2.2 numEclipse PerspectiveBefore we describe the numEclipse perspective, lets have a look at the project created in the last section. The navigator view on the left of the previous figure shows the project. It consists of two folders (i.e. "Interpreter" & "Source") and a default interpreter "default.i" created under folder "Interpreter". If the navigator view's filter does not block ".resources" files then you will also be able to see the ".project" file created for the numEclipse project. The central area of the window shows the "default.i" interpreter. This is where most of the user interaction happens. Here you will type in commands and look at the response, as shown in the following.
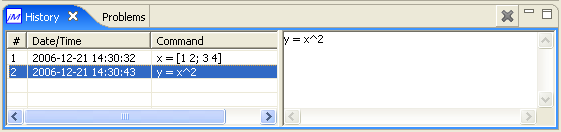
The area at the bottom of the perspective shows history view. This view keeps track of all the activities happening in the interpreter. This view has two parts, the area on the left of the history view shows the sequence number, date/time and the command in chronological order. The area on the right of the view shows the details of the command selected on the left, as shown below.
The cross
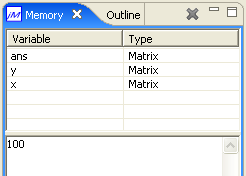
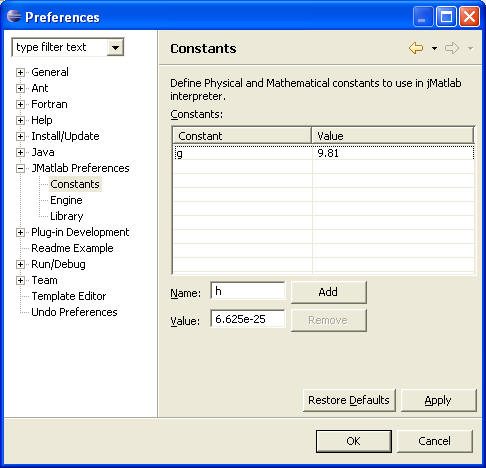
Unlike MATLAB, you can open more than one interpreters at a time. Say you want to work on calculus, right click on Interpreter folder and create a simple file "calculus.i". This will open an another interpreter window in the center of the perspective. The memory and history views are associated to the active interpreter. When you switch the interpreter window, the memory and history views will reflect the activity in the current active window. You can also save the session for each interpreter using File → Save As. Next time when you launch the application, it will load all the variables and history from the saved session file. Another important component of the numEclipse perspective is the "Preferences". We already saw in the previous chapter "Installation and Configuration", how to setup the gnuplot application using the "Preferences". numEclipse has a very interesting feature which is not available in MATLAB. It allows you to define your own constants. Select eclipse menu Windows → Preferences, it will bring up the "Preferences" dialog box. On the left of the dialog box, expand the category numEclipse → Preferences and select "Constants", as shown below.
As soon as you add the constants they become available in the interpreter, as shown in the following.
There is more to the preferences, which we will discuss further in next chapters. 2.3 Writing ProgramsnumEclipse makes writing an m-script program very easy. Say, you want to write a simple program to find the square of a number. Right-click on the "Source" folder in the navigator view, and create a simple file "sqr.m". This will bring up the text editor window within the numEclipse perspective. Write and save the program as shown belong.
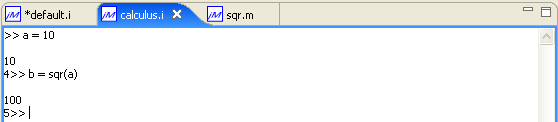
You can quickly test the function by switching to the window "calculus.i", as shown below.
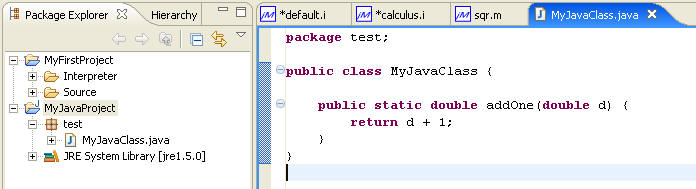
Eclipse is one of the best free development environment for java. Since numEclipse is based on eclipse platform, it takes the advantage of this technology and provides integration with the java development environment. In the following, we show how to write a java function and use it within the interpreter. Select eclipse menu File → New → Project, it will bring up "New Project" wizard. Select "Java Project" and click on "Next" button. Type the name of project on the "New Java Project" dialog box and click on "Finish" button to create a new java project. In the following window, we show a java project "MyJavaProject" containing a class "MyJavaClass" and a static method "addOne".
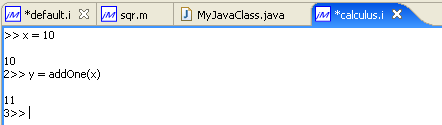
Once the class is successfully compiled, you can immediately start to test or use in your interpreter. Right-click in the numEclipse project "MyFirstProject" and select "Properties" from the pop-up menu. Select "Project References" on the "Properties" dialog box and select "MyJavaProject". This establish the link between the two projects. Now, switch back to any interpreter and try out the function "addOne" as shown in the following figure.
This chapter provides the basic information about the numEclipse's working environment. It talks about creating a project, explains the default project structure, describes the perspective, talks a little about writing program in m-script and java. In order to write complex programs and making them available for deployment as a product, further information will be required. In the next chapters, we plan to cover more topics which will help you develop complex scientific applications. |
||||||||